A Big Warm Hello – 3D images Tutorial

Hello everyone!

I hope that you have been enjoying the fall season! I love everything about fall, except for the gross icky colds I seem to catch. I’m just getting over one now, I have my good days and bad days. Hoping that it will just decide to go away very soon so I can get on with my crafty fun!

I’ve fallen in love with the Christmas with Wellington paper pack and 3D images! They are just so stinking cute! You not only get two of each 3D image but a TON of other images to use on Christmas cards. Here are a few examples of some of the  3D images that you get in the package.

DSC_9495DSC_9497DSC_9500

They are so cute, I could sit around and put them together all day.

I decided that I wanted to create my own 3D images using my own stamps from Penny Black called Jolly Critters. I love this stamp set that came out last year

Here is how I created the 3D look. I stamped the image twice, once on my project, and another time on a separate piece of paper. I then coloured my images with Copic markers before I cut them out.

DSC_9464

After I cut my images out I applied foam tape to the images I wanted make 3D

DSC_9467

I then placed the images on my project over the images that I have already stamped DSC_9470

After my first layer of the images they looked something like this. Pretty cute eh? DSC_9472

I decided to stop here with my 3D image, because I thought that it was cute enough, but you could continue to build up your images with as many layers as you want. I plan to do a lot more cards in the future with a bit of 3D Flair. I hope that you enjoyed this quick tutorial. Stay tuned for more crafty fun heading your way. Now that things have settled down in my life, there will be more crafty goodness happening on my blog and more video’s too!!

See you soon!

Tina

Hello 2015

Hello everyone,

I hope everyone had an amazing Christmas and a great New Years!! Did you stay awake till midnight?

Just a quick update of the classes I am teaching at Precious Memories , you can check out their January calender HERE.

I am teaching the following classes: Lawn Fawn Watercolour, Lawn Fawn Landscapes, Birthday Bunny, and One Background 5 Cards. If you have any free time coming up in January, I would love for you to join me in some creative time. Make sure to subscribe to my blog as well on the Precious Memories website, so you receive emails of upcoming classes and coupons. Keep your eye open in February for some fun Valentine’s day classes.

Do you love to Crop?! Precious Memories is putting together a 13 hour crop that is happening on April 26th, 2015! Find all the information HERE. We would love for you to join us for a day of fun. There are tons of prizes and goodies that are handed out throughout the day. Make sure to sign up before tickets are sold out!!

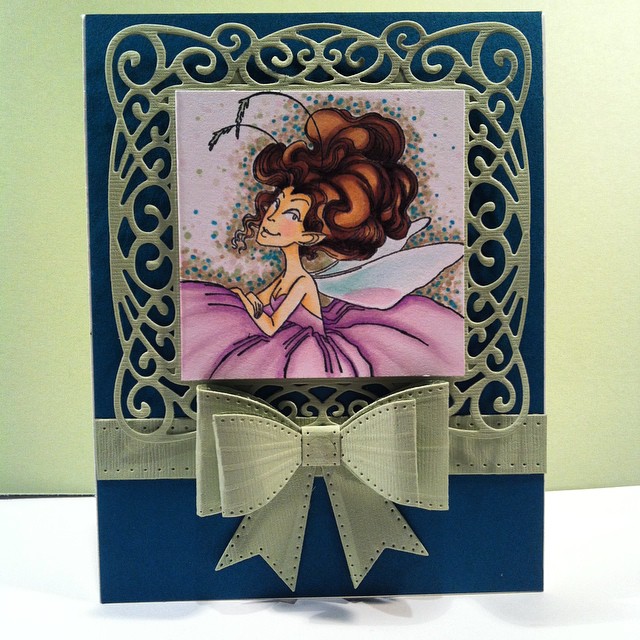
Today I am sharing a card that I made using Creative Expressions craft dies, Kraftin Kimmie images and Copic markers 🙂 Since Christmas, I haven’t had a ton of inspiration, so I am slowly starting to get back into the swing of things again. I’m excited about all these new stamping and scrapbooking products that will be coming out in the spring that it has started to get me excited again to play with my toys 🙂


10347612_10152561142252765_1235021433671913829_n


Thanks for stopping by,
till next time crafty friends!


Tina

A Birds of a Feather….

Hey everyone,

Hope your November is going smoothly! I’ve seem to hit this gross cold that has given me a sore throat and a runny nose like a leaky faucet.
I wanted to share a couple of things with you in this update.

1. Craft Fairs!
I have quite a few of them coming up, and I would love you see your smiling face if you are in the area!

I hope that you will be able to make it out to one of these events!


2. An Update of my latest classes that I will be teaching at Precious Memories. Make sure to check out their Nov and Dec classes HERE. I will be teaching the following classes:

  • Nov 13th Hero Arts Holiday #1
  • Nov 20th Christmas Copic Cards #2
  • Nov 23 Christmas Copic Cards #1
  • Nov 19th Hero Arts Holiday #2
  • Dec 2nd Glittery Holiday Cards

Make sure to take a  look at the other wonderful cards and classes that are available at the store.The ladies who work at the store are very friendly, and super helpful.

3. The latest cake I’ve made!!

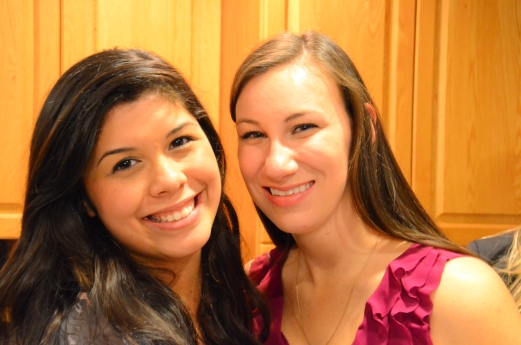
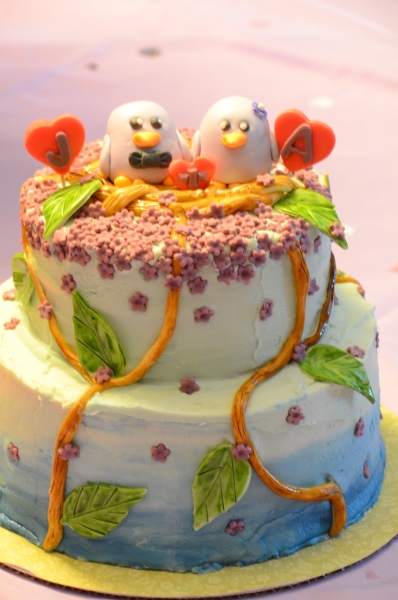
I got the honor of making a cake for one of my very dear friend’s engagement party. I have known this beautiful woman since grade 3. She has been an inspiration and a role model to me for most of my life. She has so many virtues that I admire, she is a hard worker, committed and honest . When I first met Alicia, let’s say we didn’t hit it off as best friends right away, but I knew that I wanted her to be my friend and persisted ( in other words, I didn’t give her a choice) she was going to be my friend whether she liked it or not. Eventually she gave in, and we became BFF’s. We went to the same elementary, middle and high school and she always stood beside me and my crazy ideas (some of them were questionable) she would just stand there, roll her eyes, laugh and say ‘Oh Tina…’. Through the drama, the heartbreaks, the awkward growing stages and the ridiculous math tests she would always be there for me. I still remember those days when we would play with ‘My Little Pony’s’ for hours, or when her family would take me to the beach with them and I would spend the whole weekend at their place. They always made me feel welcomed and made sure I was well fed (and still to this day I get cookies and veggies from there garden! Can you say lucky?!) . I love her family so much, that her mother is, and will always be my second Mom. Alicia is the type of person that makes you feel welcomed anywhere, and you would just want her to be your friend (well, too bad she’s mine). To me, Alicia has become my sister.

DSC_2457

Alicia and Jake (her fiance) have made so many steps in their new life together, they bought a house, got engaged and have already made their parents grand-kitty-parents!  I’m so excited for their wedding. Alicia stood beside me for one of the most special days of my life, and I can’t wait to do the same for her! and then nag her to have BABIES RIGHT AWAY!!! So the title of this cake is ‘Birds of a Feather’ because we always stick together (and of course, now her and Jake will be together!) Can’t wait for them to start an amazing journey!


DSC_2407 DSC_2409


DSC_2471


xoxo

Tina

To My Amazing Husband

To My Amazing Husband,

Today marks our one year anniversary and your 31st birthday. Happy Anniversary and Happy Birthday. I still remember our wedding day like it was yesterday, butterflies were in my tummy and a big grin on my face as I couldn’t wait to walk down the aisle to marry you.  We were so lucky to be surrounded by our amazing family and friends when we tied the knot. I could feel so much love from everyone, and from you. As we stood there and said our vows, couldn’t stop smiling. I was so lucky to have found someone as amazing, wonderful and caring as you!

EIP-Thomson-151

Vows: 

Rob 

I promise to always share with you, be honest and appreciate every craft you make for me

I will always do my best to look past the mess in the kitchen, have coffee ready for you in the morning and continue to give you ridiculous nicknames.

I promise to always be there for you as a friend and lover

I will always hold your hand and not go to bed angry

I promise to always love you

Tina

I promise to always be your best friend, a reason you smile and a person you love

I will always sing and dance along to your songs, take care of you when you’re sick and look past your growing collection of instruments and gadgets

I promise to listen to you and kiss you good morning…after you serve me coffee

I will always hold your hand and never go to bed angry

I promise to always love you

EIP-Thomson-174

It’s not everyday that someone finds their soul mate. I believe that I have found mine. You are always there for me, through my injuries, my indecisiveness of…. everything, and you always make me laugh at the end of the day. I always look forward to coming home and seeing you, because you always make me smile. Our marriage is wonderful and I am so happy to be with you. Thank you for being you.

EIP-Thomson-336

As much as this day is about us, it is also about our family and friends who stood beside us during that wonderful day.Thank you to our friends, thank you to our family who help complete us and help our relationship grow. Without you, we wouldn’t be who we are today. 
    EIP-Thomson-238

EIP-Thomson-256

EIP-Thomson-241

EIP-Thomson-553

EIP-Thomson-554

EIP-Thomson-556

Photo Credits to Elaine Innes Photography
Who is one of the sweetest, kindest, most caring and dedicated Photographer I know (if I could, I would put her in my pocket and carry her everywhere with me)

To My Amazing Husband,
Thank you

xoxo Tina Thomson

Monkey Baby Shower

Hi Everyone,

Just a quick post of a cake I did in September for a beautiful mother to be! She is one of the funniest, caring and most relaxed people I have met. Whenever I see her she is always smiling and glowing.

Monkey Baby shower

Me and the Mother to be

monkey baby shower 2

Monkeys Monkeys everywhere!


The theme of this party was monkey and I decided I wanted to put a big monkey on the top of the cake. They have also already painted the nursery with a skyline view of one of the superheros that the husband really likes. So I decided to add that to the bottom of the cake too. Then of course I had to make the monkey a superhero!! The shower was really fun and full of wonderful games! This child received so many wonderful gifts and is going to be surrounded by family, friends and love his whole life. I can’t wait to meet him next month!


Monkey Cake by Tina

Super Monkey!


monkey cake by tina 2

Eating one banana at a time


Well that’s it for this baby post! I can’t wait to show you the next cake I made!

Till then have a great weekend!

xoxo

Tina

Precious Memories

Hello Everyone,

Holy Smokes was September ever a busy month, not to mention it went by very very fast. I would have enjoyed having a couple more days. There just doesn’t seem like there are enough hours in a day or days in a week (although for some people I think 7 days in a week is too many)

Stay tuned for some blog posts for some cakes that I have done.

Did I tell you that I am a new instructor for Precious Memories?! I am so excited to start teaching classes there. You can find out all the information on the classes I am teaching in October HERE

Here are a few samples of the classes I am teaching:

One background stamp 5 cards

989978_orig

Lawn Fawn Landscapes 3413924_orig

Christmas Copic Colouring 7891683_orig

Make sure to check out their website HERE sign up for their newsletters so that you can see all the new product that they are always bringing in, and for the schedule for the classes. Also don’t forget to follow them on Facebook, Instagram (@myscrapbookshop) and Twitter and if you have the opportunity make sure to drop into the store and say Hi. All the ladies who work there are super friendly, nice and talented. They can help answer any of your questions or help you find anything you might be missing in your crafty closet!

If you have any questions, please don’t hesitate to ask!

See you soon!

Tina

Baby Shower

Hi Everyone,

Quick blog post today. I’ve been super Busy, but I have wonderful news for you.

1. I started Physiotherapy last week, so I’m going twice a week at the moment.
2. I got a new job at a store called Precious Memories where I will be teaching card classes 🙂 I am beyond excited to be working with them. It is really challenging me as a crafter to be extra creative!

So today’s blog post is about the baby shower I did a couple of weekends ago. My best friend (of 20 years) is going to be having her first child. Her due date is Oct 28th – ish. I am very excited and honored to become an Auntie!! Hopefully they have lots and lots of babies that I can play with!

I was so thrilled that I was asked to help to plan the shower and make the desserts. We decided to theme the cake and cookies ‘Rubber Ducky’. I Love rubber ducks!

DSC_1593

this was my first time playing with fondant, and I made the fondant myself! I also decided to make it into a polka-dot cake! because its a BOY! DSC_1639

DSC_1597Cute little bows for the top of the cupcakes

DSC_1625

Little ducky cookies that look like they are have a bubble bath was the party favors. So cute!

DSC_1611And to add a little pizzazz I made little popcorn bags that say ‘about to pop’!!
Thanks for stopping by. Keep an eye out for more of my future creations~

Tina

Summer Life as a Crafter!

Hello everyone,

Welcome to my new site! You are able to find me now by typing in http://www.uniquelytina.com yeahye~! No more blogpost.com stuff!!
Feel free to take a look around.  You can find/follow me on facebook, instagram and twitter. All of the links to the social media is on the side bar on the right hand side of the screen. You’ll also notice that there is a Cookies, Cakes and Sweets tab. You will be able to click on it and it will take you to all the posts I’ve done that have something to do with cookie decorating, cakes and sweets 🙂 Pretty cool eh?

It has been awhile since I have posted. Let me tell you why. As if summer wasn’t already busy enough as it is, I ended up injuring myself at work at the end of July. How you ask………. Dodgeball.

I took an ambulance over the emergency where they took x-ray’s of my ankle to make sure it wasnt broken. Overkill you say on the ambulance ride? Probably, but it was cool, and I’ve never ridden in one before! (I guess that’s a good thing?)

10463025_10152218963032765_4244024901661903805_n

But first let me take a selfie!

So the good news is that it’s not broken, the bad news I might have torn the ligaments in my ankle. It was too swollen for the doctor to be able to diagnose it.  So for now I am sporting a pretty good-looking air cast. I find out in the beginning of September if I am able to start Physiotherapy. I have a feeling that this injury is going to take more than a couple of weeks to heal……

10343690_10152234020077765_6764037684833639046_n

I am back to work (on light duties) and being shuffled around getting some paperwork done for everyone. Not as exciting as playing tag or dodgeball with all the girls from summer camp, but its better than sitting at home and watching Netflix. I am currently obsessed with the T.V series of Chuck and Drop Dead Diva.

Summer time is always a busy month for me. It’s the time when lifeguards and recreation leaders make most of their money, working long hours and multiple jobs. This summer I have had lots of time to create at my craft desk because… lets face it, it’s not like I can do a ton of work, or do anything active at the moment.

Here are some of the cards that I have created over the past month. I found an old video that I have to edit, but that will be up soon, so stay tuned!

This first card is inspired by the galaxy backgrounds that Dawn and Krsitina Werner did on their blog/youtube channels, make sure you take a moment to watch the video if you haven’t done so yet. They are both amazing at watercolouring and have totally gotten me hooked! I recently purchased a set of Zig Kuretake Gansai Tambi from Mama Elephant and I have fallen in love with them . I’ve never had such amazing watercolours before! If you are looking for more information on them, Jennifer McGuire does a video on them HERE and HERE. For the letters I used Lawn Fawn Milo’s ABC’s, and TA-DA.

shoot for the stars


For my second card, it was inspired by the Online Card Class, Stretch your Stamps 2! Can you guess what technique I did here?…. You guess it, More water colouring! I started with some light shades of distress ink, and watered them down to coat the whole embossed image. After it dried, I took some darker colours, added some perfect pearls and water and then start to paint in the details on the background stamp. This stamp is from Hero Arts. Its one of my favorite!

Hero Arts background watercolor


Now that was a long post! Thanks for dropping in!

Tina

Update of July 2014

Hi Everyone,

It’s been awhile since I have taken the time to blog. It seems that I have been super busy this past month that there has been no time to blog. During my days off from work I just want to spend time with my family or relax.

Here is what I have been up too since my last blog post. I was part of the events team that put together the City of Coquitlam’s Canada Day Celebration. This year was our biggest yet. We had over 30,000 people come at the end of the night to just watch the fireworks. Who know’s how many people we had throughout the day! I was in charge of making sure that the Cultural Village, Community/ Artisan Village and Arts Village were taken care of. It was one of the hottest day’s yet and it was wonderful.

IMG_4472

Took a selfie with the Mayor

IMG_4477

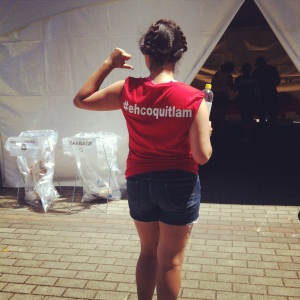
#ehcoquitlam

IMG_4480

Some of my friends who performed at the event

IMG_4478

some of the event layout

IMG_4468

Some of the activities at the event.

After the event was over I went straight into summer camps. I am teaching Girl Power 9 – 12 summer camps at the Pinetree community center. It has been so much fun crafting with these young beauties! So I have been crafting, just not much card making.

I’ve also been doing a lot of ‘fancy’ cookies lately that I have been asked to start a new blog just on cookies. So keep your eyes peeled for the ‘cookie blog’. Do you have any suggestions what I should call it?

IMG_4534 IMG_4515IMG_4384

Since I haven’t had time to create a video on my cards, I thought I would post a couple that I’ve recently made 🙂

IMG_4330 IMG_4432\

Yes, I made a Christmas card 🙂

thanks for stopping by, and I promise to be back soon with more cards and paper-crafty goodness!!

xoxo

Tina


Embossing Paste Thanks Card

Hey Everyone,

Today I’m entering my card into TWO challenges.
The first challenge I am entering into is the Winnie and Walter Playdate No.2. You can read more information about the challenge on the blog HERE.

Winnie and walter challenge JuneI’m also entering this card into the Simon Says Stamp Wednesday Challenge. You can read more about the challenge HERE.

Simon Says Stamp Wednesday Challenge Blog


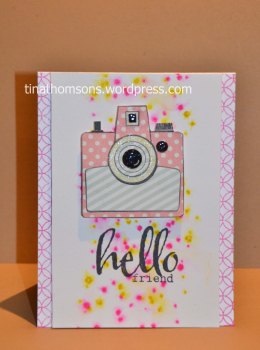
Today I wanted to use embossing paste on my card with the Winnie and Walter Cut flies. I tried to make a stencil and use that with the embossing paste, buy my acetate was too thick for my Silhouette.  I’ll figure out something else….

embossing paste thanks card

Thanks for stopping by~

Tina


Copic Colouring – Winnie and Walter Playdate No.2

Hey Everyone,

Thanks for joining me today. Today I created a card for the Winnie and Walter Playdate No. 2. You can ready more about the  challenge HERE.

Winnie and walter challenge June


I created my card using the Saturated Canary image. Go HERE to check them out, the images are so much fun to colour!  I used “The Write Stuff: Picture Perfect” stamp set from Winnie and Walter to create the background and “The Big, The Bold and Happy” for the sentiment. This card was so much fun to make!

Baby Copic Colouring


Check out my YouTube video, and leave me a comment letting me know that you though!

See you soon!
xoxo

Tina

Check out my facebook page HERE


Winnie and Walter Playdate Card no.2

Hi Everyone,

Thank you for joining me!
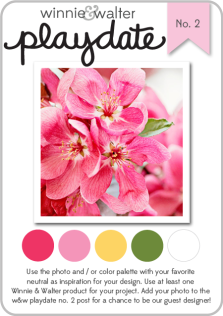
Today I have a video for you, using Winnie and Walter stamp set again! If you haven’t already check out their blog HERE to find out more information about their playdate challenge! Its been tons of fun playing along! Here is our inspiration picture that we are to use for our creations!

Winnie and walter challenge June


I recently visited Columbus, Ohio to attend the first #Simonsayscreate event. It was my first big stamping and scrapping event, and it was beyond my expectations.  I had such a great time and met so many wonderful people.  I can’t wait to go back next year!

While I was at the event I got to meet Shay, one of the owners of Winnie and Walter. The best part was, she sat across from me for the entire event!! I had such a great time getting to know her!

simonsayscreate8She is so nice and a down to earth person! She is also a super crafter and is differently NOT afraid of colour! GO SHAY GO! We had fun getting inky/messy together.

Today’s Card I used three of Winnie and Walter stamp sets. The Big, The Bold and the Happy, Big Bang Confetti and The Write Stuff: Picture Perfect. All three stamp sets are wonderful to play with separately or together!

Please let me a comment of what you thought of my video! I love feedback and am always looking at ways to improve my videos!

Winnie and walter 3


Have a wonderful day!

xoxo

Tina

Winnie and Walter Play date no.2

Hi everyone,

Thank you for joining me today. Today I am participating in a Winnie and Walter Play date challenge. You can read about the challenge HERE,

This is the picture/ colours that we are to use for our inspiration!

Winnie and walter challenge June


I decided to use a technique that I learned from the wonderful Jennifer Mcguire! Make sure you check our her Blog HERE

So today I used two stamp sets from Winnie and Walter. I used The Big, The Bold and you as well as Big Bang Confetti. They are awesome stamp sets and I can’t wait to play with them some more!

Winnie and walter 1 Winnie and walter 2


Thanks for stopping by!

Tina

Simon Says Create

Hi Everyone,

Thanks for joining me today. Sorry its been awhile since I’ve last posted. I went to the Simon Says Create event in Columbus, Ohio. Man was it fun! I met so many wonderful crafty ladies and artists.

I follow so many of the artists that I met this weekend on youtube!! I met Jennifer Mcguire, Shari Carrol, Laura Bassen,  Kelly Anne Marie, Sandy Allnock, Stephanie Klaunk, Kristina Werner, May Flaum, Kathy, Heidi (owner of Simon Says Stamp) and Tim Holtz!! Just to name a few 😛

While I was at the Simon Says Create event I met Bonnie and Sheri, they sisters who adopted me as their daughter for the weekend! The best part was, they were from Canada too!

simonsayscreate6

You can check out Bonnie’s blog HERE! Drop by and send her a line!

Here are some pictures I took while I was at the event. You can see more pictures on my Instagram! Follow me TinaMThomson !

simonsayscreate7

simonsayscreate5

simonsayscreate3 simonsayscreate


I had so much fun! I can’t till next year!!

see you soon!

Tina

Faux Hand-Painting 2

Hi everyone,

I’m participating in the online card class called Watercolor of Card Makers. Best class ever. I am learning so much, and looking at my stamps in a whole new light!

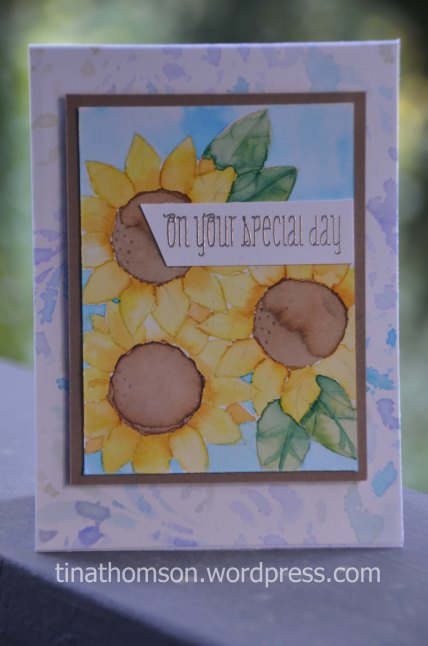
Today I wanted to share another project that I did with Faux Hand-Painting.  I used a combination of Lawn Fawn Blue Skies and Sunny Skies stamp sets to create my scene. I stamped them in a light ink and used distress makers to start painting in my image. This one was a bit more challenging to me as it took more colors that the sunflowers that I created.

watercolor 4The sentiment is from and Avery Elle stamp set and heat embossed with Liquid Platinum. Amazing results every time.

thanks for stopping by, leave a comment below if you have any questions. I love hearing from you.

Tina


Faux Hand-Painting

Welcome back,

I wanted to share a project with you that I created this morning. Its called Faux Hand-Painting. Its my absolute new and favoritest technique ( know favoritest ins’t a word)

I learned this technique from the online card class Watercolor for Card Makers. By far the best online card class yet. Well… they are all amazing! But I’m really, really REALLY enjoying this one!

I used a really light ink to stamp out my images and then using my distress ink markers I slowly started to paint in image in, adding a little bit of shading here and there. I used the Lawn Fawn stamp set Friendship Grows.

watercolor 5


The background is created with a Hero Arts background stamp. I put three different colors of distress inks on the background and then heavily sprayed it with water. I laid my watercolor paper on top of it, and ta-da the most amazing background EVER!

The sentiments is from a WPlus9 stamp set and heat embossed with Liquid Platinum embossing powder. LOVE!

thanks for dropping by!

Tina


Watercolor Stamping 3

Welcome back!

I am on a roll today and wanted to show you all the cards I have been making. I have been busy!

I’m taking an online card class called Watercolor for Card Makers!}
Make sure you take a moment to check them out!

This is my final watercolor stamping card I created using the Art Impression rubber stamps. They are just so much fun to play with. I will say, it did take me a little time to get used to stamping with such small images. It also took me great restraint to not use a tons of water, for this technique you use very little water. Just to every so slightly soften the edges.

watercolor 6I stamped the background with a Hero Arts background stamps, and heat embossed it using the Liquid Platinum embossing powder from Ranger. I used this for another card and fell in LOVE! Watch out, because everything from here on out will have this embossing powder on it!

Leave me a comment below if you have any questions

Tina


Watercolor Stamping 2

Hey Everyone,

I’m taking an online card class called Watercolor for Card Makers. Its wonderful class full on inspiration, talent and great techniques! Make sure to check them out!

Here is another card I created using Art Impression rubber stamps!

watercolor 3I wanted to keep the rest of the card really simple, so I found some nice pink rose pattern paper in my paper stash! Hope you like it!

If you have any questions please leave me a comment below

Thanks

Tina


Watercolor Stamping

Hi Everyone,

Short blog post today, as I want to get a bunch of posts in AND go back to my desk and play some more!

If you’ve been following me on Instagram, you know I am taking an online card class called  Watercolor for Card makers. Its been one of my favorite classes by far! I really enjoy playing around with watercolor and creating fun scenes and backgrounds.

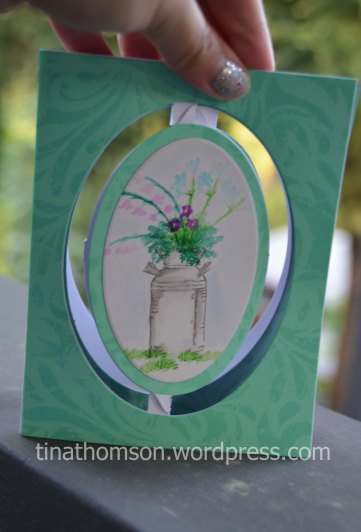
For my first project I used the Elizabeth Craft Design Accordion Oval Card Die. Click HERE to see what other products and shapes they have.

watercolor 2

All of the floral images are from Art Impression. I used my watercolor markers to color over the image, stamp it and then use just the tiniest amount of water to create the watercolor effect.

watercolor 1


If you have any questions, leave me a comment below!

Thanks for stopping by

Tina

Mothers Day Card

Hi everyone,

Happy Mother’s Day to you!

Today I wanted to show you the card I made for my mommy and my mother-in-law. I’ve been taking the Online Card Classes: Watercolor for card makers and it is a wonderful class. I’m pretty sure I have taken all of these online classes because they are full of wonderful ideas and great resources. I recommend that you check them out.

For my cards, I decided to used a technique that Jennifer Razasa  taught on the very first day. Its by far my favorite technique today! After you create your watercolor background, you place your stencil over top of the wet paint allowing the water to pool into the stencil. You then put a cup (or stamping block) on the top to create some pressure and maintain contact with the water and stencil. After it dries (waiting is the hardest part!) when you lift the stencil you get a really neat background. I know your probably reading this and scratching your head, but trust me! Its so cool! You just have to take this class just for this one technique!

Here are the cards I made.


Mothers Day card 2014 4

I used distress ink to paint my wonderful background. The pink card has peacock feather, picked raspberry, and salty ocean.

Mothers Day card 2014 3

you can see where the color pools into the stencil when its left on top of the watercolor.

Mothers Day card 2014

For the blue card I used the distress ink colors salty ocean and antique linen. I love using antique linen on my watercolor backgrounds because it provides such a nice and soft color when dry.
Mothers Day card 2014 2

For the embellishments, I created the butterfly from a Simon Says Stamp exclusive die, and added an enamel dot in the middle of the body. A few sequins, pop dots and thread in the background and my card is complete!

Thank you for joining me, and I hope that you had a wonderful mother’s day!


Tina

Mama Inspiration # 6 Clear Embossing Paste and Gelatos

Hey Everyone,

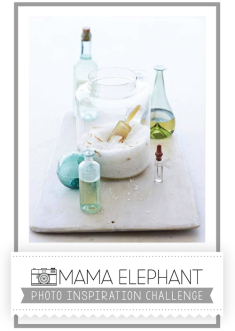
Today I have my final entry for the Mama Inspiration photo challenge. You can read about the photo challenge HERE. This is the photo that we are using to inspire us to create our projects.

2104-04


For this card I really wanted to use some embossing paste. When I first started getting into card making, I bought Dreamweaver embossing paste and a bunch of stencils. I never really got into embossing paste because it was so messy! I don’t have a sink near me, so it was a lot of walking back and forth keeping everything clean. If you know me, I HATE cleaning as I’m working. Interrupts my train of thought. I’m sure my family can vouch for that.

For this card, I put together a YouTube Video. I did a different style of editing and my wonderful husband put together some music for me to put in the background. After you watch it please take a moment leave me a comment and let me know if you enjoyed this style of video.

DSC_1416


In Vancouver its been teasing us with some wonderful heat and sun. While everyone is work… as soon as 5pm hits, or the weekend comes its RAINING, ALWAYS RAINING! (Better than snow!)

DSC_1417I played with Gelatos, and Dreamweaver’s embossing paste in translucent. TA -DA! All the supplies are listed below

I you are interested in seeing some of my other Mama Elephant Photo Inspiration enteries, you can find them HERE( one), HERE (two), HERE (three), HERE (four), HERE (five)

Thanks for taking a moment to stop by!

xoxo

Tina

Mama Elephant Inspiration #5

Hey everyone,

Thanks for dropping by again. I have another card for you from the Mama Elephant photo challenge. This is the photo that we use as our inspiration, and you can read more about the challenge HERE.

2104-04

My Card today is inspired by the colours in the photo.  I also wanted to add some texture to the card that is inspired by the sand in the picture.ME4

I thought it would be fun to use Tim Holtz Rock Candy glitter on my clouds. I cut my clouds out of velum using the ME Landscape Trio die set and used glossy accents to glue the Distress Glitter on.  I set it asideto dry and when I came back to it, the velum had curled and wasn’t really laying straight. I need to figure something else for next time. Overall it added some nice demention and sparkle to the card.

I decided that if I am going to do sparkels on the clouds, that the WHOLE card was going to have a shine! I used the ME Femme Frame die cuts to cut my panel, and then used the Heidi Swapp color shine to create my background. I sprayed the sun rays using the Tim Holtz Ray stencil and the Heidi color shine in gold. It created such a nice effect.

ME4 number2Here is a close up of those nice clouds.

I used the hiedi swampp mists to paint my balloons, and used Vintage photo to water-colour the cute fox!

I adhered it all together with glossy accents and pop dots and ta-da that’s about it! Pretty darn cute if I say so myself!

Thanks for dropping by, see you again soon! For my next post, there will be a YouTube video!

Tina

Mama Elephant Photo Inspiration Challenge #4 and Easter Weekend Treats

Hey everyone,

Did everyone have a good Easter?! I hope everyone got around to some crafting!! Today on my blog I wanted to share my favorite card that I have made for the ME photo inspiration Challenge. You can read about the challenge HERE.

This is the photo that I used as my source of inspiration

2104-04

If you haven’t yet, check out my blog posts Here, Here and Here to see the cards that I have already made using this photo as my inspiration.

Here is the card that I created today!

ME Monkey

I used the Up and Away stamp set to create the monkey holding on to the balloons, and water coloured the monkey using my distress inks. I then paper pieced the balloons with some scrap paper I had lying around my craft desk that seem to fit the theme perfectly.

I water coloured the background using the distress inks Antique Linen, Broken China and Bundled Sage. The flicks of concentrated colour are from a Heidi Swapp color shine is Seafoam. I also put a coat of glossy accents over the balloons 🙂

The sentiment is from a ME stamp set that I received in their class when I was on my trip in New York 🙂

I always seem to get a grin when I look at this card 🙂 It was so much fun to make!

Moving on to Easter! This Easter I made some delicious sugar cookies with some fancy icing, it was a ton of fun, and super messy. Here is a look at what some of the cookies looked like.

DSC_1354So pretty!! My favorite ones to make were the Easter eggs and the butterflies.

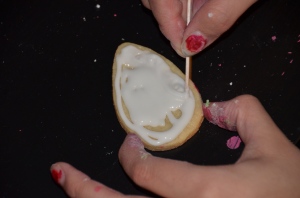
Here’s how I made them. Using Flood icing I covered my cookie. I used my toothpick to drag the icing to the edge and smooth out the icing.

DSC_1361

While the icing was still wet I dropped a second colour right on top (usually stripes or dots… wow isn’t the table messy!!)

DSC_1346


I then dragged my toothpick through the colours creating a really cool pattern!!

DSC_1350


Ta-Da!

thanks for stopping by!!!

Tina

Mama Elephant Photo Inspiration #3

Hello again!

Today I wanted to share another card I made for the Mama Elephant (ME) Photo Challenge. You can read more about the photo challenge HERE .

Here is the photo that we use as our inspiration:

2104-04


The card that I made today focused more on the colour scheme than the theme (of beach).

I made…. a …. CHRISTMAS CARD!

I know… crazy right?! Its only April. I’m either realllllllly early…. or super late. You decide 😉

ME deer

I inlayed the Femme Frames again to get the stitched border around the image, and their Speech Trio to create the talk bubble.  The stamp sets I used were Merry Greetings, and Winter Wonderland. I love both of these sets so much! I also used their inks!! I used Ocean, Winter and Hazel. If I were to recreate this card, I would use Smoke for the sentiment instead of Ocean to add a softer look 🙂

Thanks for stopping by today to check out my blog. Come back again soon!

Tina

Mama Elephant Photo Inspiration # 2

Hi everyone!

Today I created a card using the Mama Elephant
(ME) Photo Inspiration Card Challenge. Click Here to read more about it.

Here is the photo that we are to use for our inspiration:

2104-04

For this card I wanted to focus on the colour theme of the photo. I also wanted to create my card just using ME’s stamps and inks. I thew in  a couple of pattern papers that I had lying on my desk.

ME bunny


I first die cut the middle using the Femme Frames creative cuts die. I really wanted the stitched boarder. I kept both pieces of the die cut and use the Basic Boarders stamp set to create the background using the ME Ocean and Winter ink pads (my favorite colours).

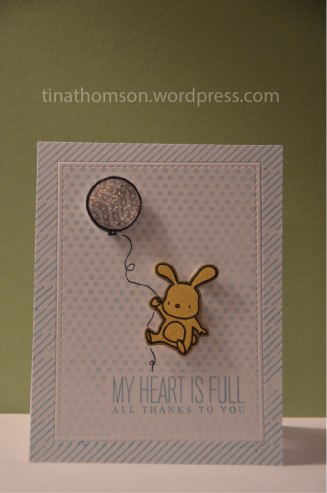
I used the Up and Away stamp set and coordinating dies to cut the bunny from some pattern paper. I also stamped and hand cut a balloon from the Good Times stamp set. To make the bunny stand out a bit from the pattern paper, I took a grey copic marker and coloured around the bunny.

The sentiment is from the Many  Thanks set. I find myself reaching for that one often.

Thanks for stopping by and see you soon!


Tina

Mama Elephant Photo Inspiration Challenge

Hey Everyone thanks for stopping by, sorry that its been awhile since I’ve blogged anything!!

Since my husband and I got back from New York things have been a bit busy. We started training for the 5km race that happened on April 13th. I’m happy to say i finished the race alive and I faster then I expected.  I am now currently training for the Triathlon that is happening April 27th! I know CRAZY right? and then after the Triathlon… the 10km race in September. I never had fitness goals before, and I am starting to like them now that I have a reason to exercise.

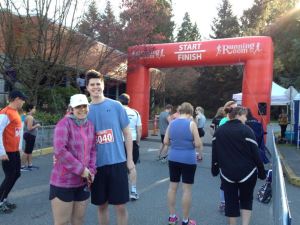
Here is us before the race! (AND IT WAS COLD!)


5k race 2

Our first 5k race!

Here is us after the race!

5k race

We did it!!

Also, here are a few pictures of my past  adventure in New York.new york

We traveled to New York in March to visit a beautiful city. While I was there I ended up taking a workshop that was put on my Mama Elephant and Kelly Purkey. People that I was half crazy flying half way across the world to take a ‘card class’ that was only one day. Nevertheless I was determined to meet these wonderful ladies. I was so blown away with how talented, knowledgeable, and amazing Kryssi, Angela and Kelly where. It was a blast, and and top of that I got to meet some amazing ladies that were there too!

P1000659

When we got to our table, there was this cute little bag with our names on it, there were so many fun goodies in it! P1000652

Kelly Purkey also gave us some fun toys to play with during her workshop! Love her Mon Ami paper pad collection!

P1000651


Kryssi didn’t really like having her picture taken up close… kept trying to ‘shoo’ the camera back

P1000649

Got a picture with Kryssi and Angela, they decided to match outfits that day! (That’s what they were telling everyone at least 😛 ) P1000656

Me and Kelly, she is so nice, pretty and funny! P1000658

I also hit up the Ink Pad in New York, loved their store. These two were so helpful and nice! I would have spent the whole day in there, and all my money!

P1000705

Overall an amazing trip.

So the moment you have all been waiting for. The Mama Elephant photo inspiration challenge. Check out their challenge HERE

Here is the photo that we have to use for inspiration for our cards

2104-04

When I look at this photo I think of three things. 1. beach 2. colour combination and 3. lost and found.

So here is the first card that I’ve made using the colour combination.

ME feather card


I used Mama Elephants Fair Feathers stamp set and their ink pads (Ocean and Winter)

I’ve been busy creating at my desk and can’t wait to show you another card I made!

Thank you and see you soon!


Tina

SSS March Card Kit

Hello everyone! Thank you for joining me today! I wanted to share not one, but TWO cards with you that I made using products from the Simon Says Stamp March 2014 Card Kit of the Month. I used the Momento Luxe inks for the first time on my card and I loved them! They are so bold and vibrant! I loved the Hello Sunshine paper pad that came with the card kit that I went out right away and bought the paper pad again! I have a feeling I’m going to be using this paper pad a lot!

SSS march Card kit SSS march Card kit2


Thanks for dropping by

Heart and Stroke Thank you Card

Hi everyone,

Thanks for joining me today. Today I have a quick YouTube video of the ‘Thank You’ cards that I made. I recently participated in a ‘Strokes for Hearts’ fundraiser for the Heart and Stroke Foundation. The event involved having team members swim for an hour at a time, or the 14 hours that the event was on. My team and I were able to swim 5 hours.

I wanted to do a thank you card for everyone who not only participated in the event but also put in a donation towards my team.

Here is the steps I took to create the easy card.

Thanks for dropping by, I’ll be back again late this week with another video.

Watercolouring with Distress Markers

Hey everyone,

No video today, just a card I wanted to share with you. This is a card I created a couple weeks ago. I had some Elizabeth Craft Designs Peel-Off stickers, and I think that they are so much fun to watercolour with.

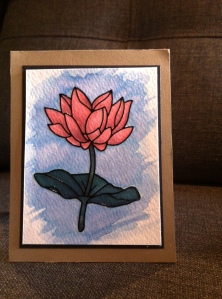
I used one of my favorite images, the Lotus Flowers and used the Tim Hotlz Distress pens to colour the image in on some watercolour paper. After I coloured the image in, I used the Tim Holtz Detail Water brush  to blend all of the colours together. I then just matted it on black and kraft cardstock.

distress makers and Elizabeth Crafts

Thanks for dropping by! 🙂

Please leave me a comment if you have any questions!

Tina

Lawn Fawn Birthday Card 2

Hi Everyone,

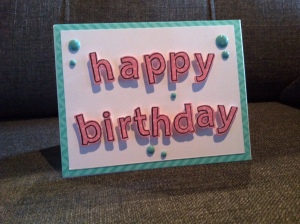
As promised here is birthday card #2. I used pretty much the same products (minus the Enamel dots). Instead of Enamel dots I used the Memory Box Die Cosmic Stars. I plan on using the die more often in the future as I have so many different ideas on how I want to use it.

Lawn Fawn Birthday 2

Thanks for dropping by!

Tina

Lawn Fawn Happy Birthday Card 1

Hi Everyone,

Thanks for coming back, today I am posting my VERY FIRST VIDEO TUTORIAL! Isn’t this exciting? I’ll admit I am a bit nervous! There are so many amazing crafters out there that have the courage to put their video’s up on YouTube, that I thought I should at least have the courage to do so myself!

So here is the card I am going to be showing you how to make today

Lawn Fawn birthday 1

I used the Lawn Fawn Quinn’s ABC’s stamps and dies to create this card, I also used the Hero Arts Tweed background stamp for the background.

Please note I said the card base is 4 1/4 x 8 1/4 and scored at 4/14, that is wrong, it is 5 1/2 x 8 1/2 and scored at 4 1/4

Remember to Like and Subscribe if you enjoyed this video! Let me know what you think

See you soon!
Tina

Watercolour background with Simon Says Stamp Die

Hi Everyone,

Thank you for dropping by today, I’ve been so busy starting a new blog and I am in the process of creating videos that I am hoping to start posting by next week. 🙂 All the final touches are being put on as we speak. Its so exciting, but tons of work.

Today I wanted to share a quick card that I made last week using the Simon Says Stamp Pointed Feather craft die and Paper Smooches Birthday Sampler.

This card kind of came together by accident, I had already created this watercolour background using Tim Holtz Distress inks with Perfect Pearls (I’ll be doing a tutorial video on it in the future) . I also had some of these feathers that I cut out of white card stock, and they were just lying on my desk and I thought it would be fun to put them together. I used the Tim Holts Distress inks to add some colour to the feathers so that they popped out from the background and then placed them on the card with the greeting and some My Minds Eye Enamel Dots. Ta-Da.

Simon says stamp paper smooches and watercolour background

Hope you enjoyed the card. Please leave me a comment telling me your thoughts 🙂

xoxo
Tina


Getting Started

Hi Everyone,

Today marks day one of my new adventure in card making. I have so many things that I want to share that its hard for me to take my time at setting everything up. I’m beyond excited to share with you all the projects that I have been working on. Its new, exciting and terrifying venturing into new programs and comfort zones.

I hope you’ll join me for my new adventures is the in the paper crafting world.

Wish me luck!

Tina Thomson